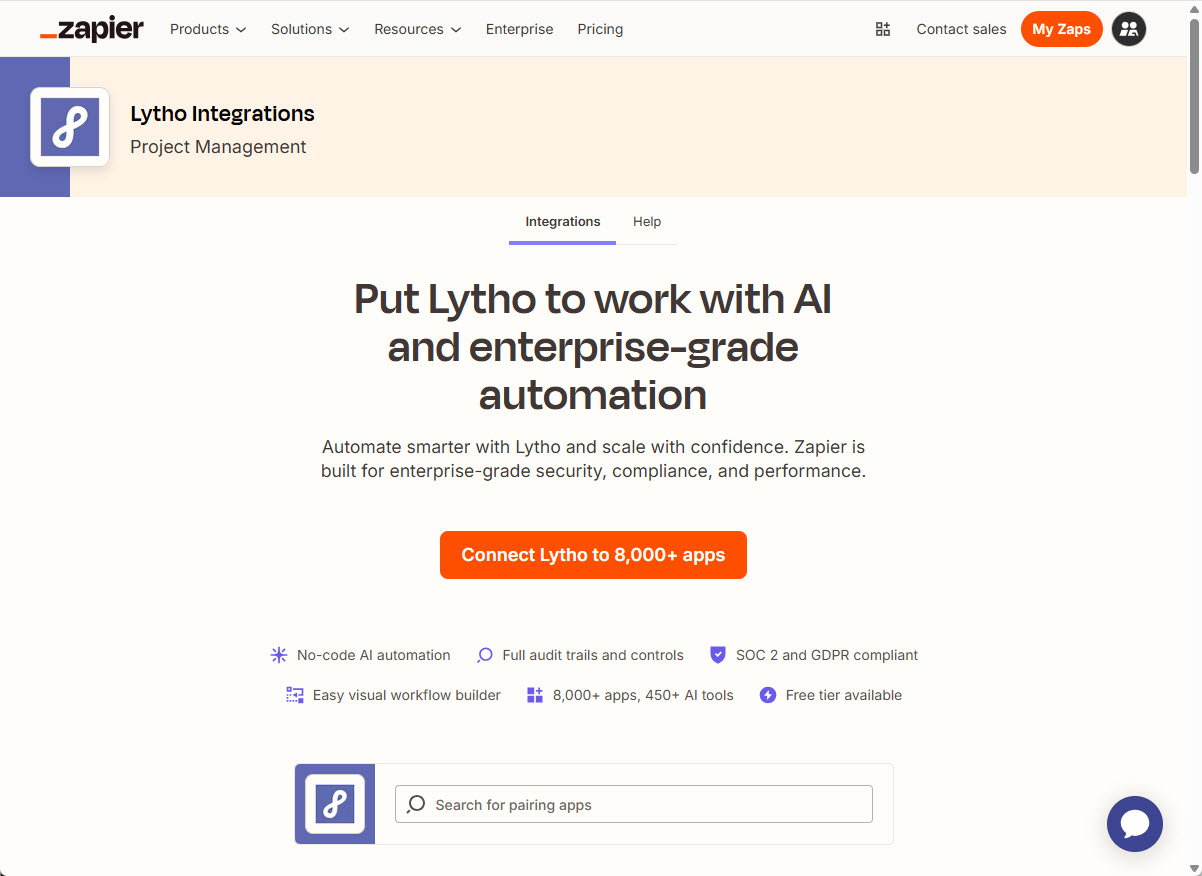
Zapier connects Lytho with thousands of popular apps, providing you with a flexible suite of integration— no coding skills required! Leverage our library of actions and triggers to save time setting up repetitive tasks, managing PTO, and ensuring communication and collaboration across multiple platforms.
Features described in this article are not included in all subscription plans. Have a question about your current subscription? Contact our Support Team for further assistance.TABLE OF CONTENTS
- Understanding Zaps
- Prebuilt Zaps to Jumpstart Your Workflow
- Getting Started with Lytho + Zapier
- Begin Building a Zap in Lytho
- Begin Building a Zap in Zapier
- Building a Zap
- Additional Resources
Understanding Zaps
Zaps are workflows that automate repetitive tasks for you. Zaps follow a simple formula using triggers and actions:
If X happens in App1 (trigger), then I want Y to happen in App2 (action).
A library of actions and triggers is available to help automate your process and connect Lytho with other tools you rely on. A trigger causes something to happen in another application based on activity within Lytho. An action makes something happen in Lytho pursuant to activity in another application.
Triggers | Actions |
| When a new Project is created in Lytho Workflow... | ...creates a Project in Lytho Workflow |
| When a Project is updated in Lytho Workflow... | ...creates a Task in Lytho Workflow |
| When a new Task or Proof is created in Lytho Workflow... | ...creates a new time off entry in Lytho Workflow |
| When a user asks for approval of an asset in Lytho Workflow... | ...searches for a Campaign by name in Lytho Workflow |
| When a new entry for time off is created in Lytho Workflow... | ...searches for a Project by name in Lytho Workflow |
| ...searches for a Project Template by name in Lytho Workflow | |
| ...upload a file to the Lytho DAM |
The general flow of creating a zap is as follows:
- Choose your trigger app: The Zap will be triggered by an event that occurs in this app.
- Select your event: This will be the event that occurs in the selected app that triggers the Zap.
- Select your app account: Select or connect the specific app account to use in the Zap trigger.
- Set up your trigger: Set up your trigger options to fit your needs.
- Test your trigger: Test your trigger to see if it pulls in the right data.
Actions and triggers can be combined in many different ways and with many different applications, but we have compiled some suggestions to help get you started!
| Type | Endpoint | Lytho Product | Example Zaps | Value |
| Leverage communication tools to keep everyone up to date - automatically | ||||
| Trigger | Project is created | Workflow | When a new project is created, automatically create a new record in Airtable | Eliminate the manual syncing of new work across multiple tools used by other teams |
| Action | Create Task | Workflow | When an event is added to an Outlook calendar, automatically create a task in Lytho WF | Capture your work in Workflow so your task list is accurate. |
| Trigger | Time-off entry is created | Workflow | When a Time-Off Entry is created, automatically create an event in Outlook. | Sync PTO events to other calendars the team uses so you only have to enter them in one place. |
| Action | Create a time-off entry | Workflow | When an event is added to Google calendar with the subject “PTO”, automatically create a time entry in Lytho WF | Sync PTO events to Workload from other calendars so you only have to enter them in one place. |
Share work across all the tools your organization uses | ||||
| Action | Create a Project | Workflow | When a message is received in Slack, automatically create a project | Automate workflows anchored in messaging apps |
| Action | Create a Task | Workflow | When a Jira task is created, automatically create a task in Lytho Workflow | Create ‘parity tasks’ in Lytho WF |
| Trigger | Task is created | Workflow | When a task is created in Lytho Workflow, automatically create a task in Jira (note: this pairs best with a multi-step zap using filtering) | Create ‘parity tasks’ in tools other teams use. |
Automate the management of assets | ||||
| Action | Upload Asset | DAM | When a file is added to Box, automatically add it to Lytho DAM | Eliminate redundant, manual tasks to store files in multiple areas |
Please access Zapier's documentation for additional information here.Prebuilt Zaps to Jumpstart Your Workflow
To help you get more out of Lytho faster, we’ve created a collection of prebuilt Zap templates that connect Lytho with your favorite tools and simplify repetitive tasks. Each template can be used as is or customized to fit your team’s unique workflows. Explore the options below to find Zaps that save time and increase visibility across systems.
Zap Name | Zap Description |
| Asana + Lytho | |
| Create new Asana content calendar subtask when Lytho project status changes | When a Lytho Project moves to the “In Progress” status and includes a Tag containing “Asana,” this Zap locates the “Content Calendar” Project in Asana and its “Placeholder” Task. It then creates a Subtask titled “APPROVED: [Placeholder]”, populated with the Lytho Project’s details — including the Project Name, Status, Assignees, and Tags. |
| Create new Asana projects from templates when new projects are added in Lytho | This workflow starts when you set up a new project in Lytho. It then initiates a Project creation in Asana, based on a predetermined template. This seamless workflow ensures you don’t waste time replicating procedures, but instead focus on accomplishing your tasks efficiently. It's perfect for those who use Lytho/Asana regularly and are keen on improving productivity in their project management efforts. |
| Create new Lytho task when Asana task is created | When a new Task is created in Asana, this Zap automatically creates a corresponding Task in Lytho. The Lytho Task includes the Asana Task permalink, Assignee name, and Tags, with the Start and Due Dates matching those from Asana. |
| Create new Lytho projects from newly added Asana projects | Effortlessly manage your projects across Asana and Lytho with this streamlined workflow. Whenever a new project is created in Asana, a corresponding project will be set up in Lytho, keeping both platforms up to date and organized. Save time and optimize your project management efforts with this seamless integration. |
| Outlook + Lytho | |
| Create Outlook event when Lytho project is created | When a Lytho Project is created with a Tag containing “Meeting,” this Zap automatically creates a corresponding Outlook event. The event’s Start and End Dates match the Project’s dates, and the meeting details include the Project Name, Assignees, Priority, Status, and Description. |
| Create Outlook event when Lytho time off entry is created | When a Lytho Time Off Entry is created, this Zap automatically creates a corresponding Outlook event. The event’s Start and End Dates match the Time Off dates, ensuring accurate scheduling visibility. |
| Create Lytho time off entry when Outlook time off is created | When an Outlook event is created with Show As set to “Out of Office,” this Zap automatically creates a corresponding Lytho Time Off Entry. The Time Off dates match the event’s Start and End Dates, ensuring accurate scheduling alignment between Outlook and Lytho. |
Getting Started with Lytho + Zapier
Zapier is a third-party application that offers both free and paid versions of their platform. Download the Lytho + Zapier integration directly here or search "Lytho" in Zapier's integration library. You may prompted to log in or sign up for a Zapier account.
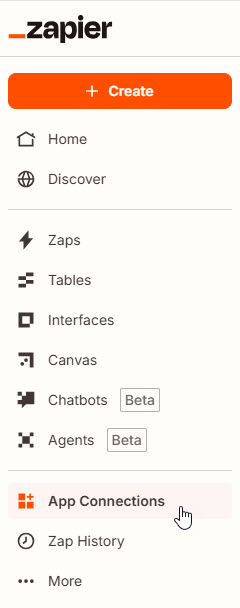
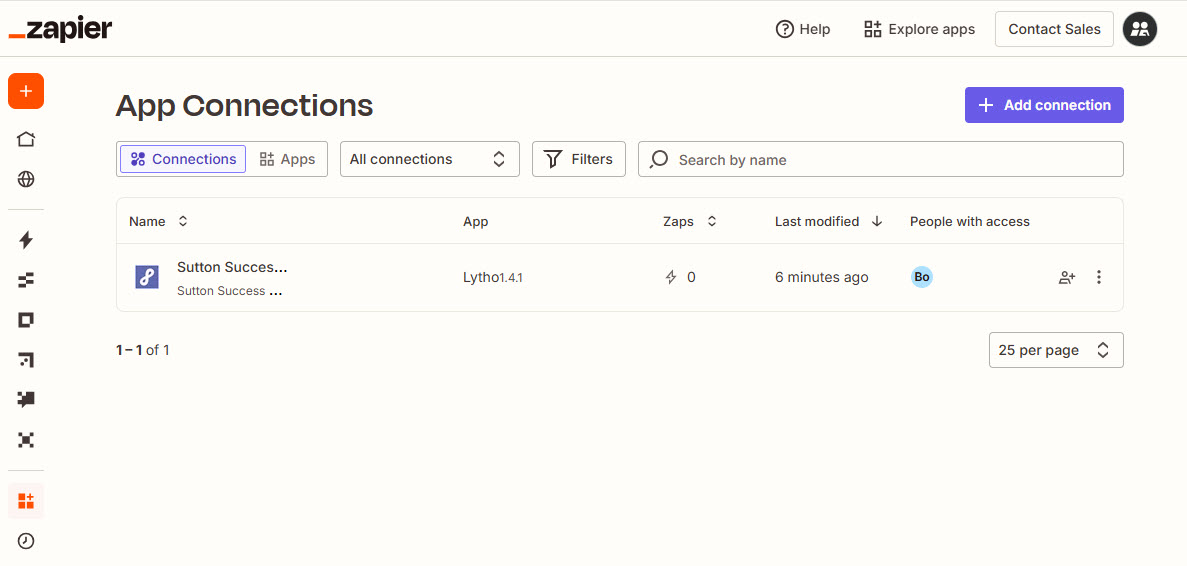
Starting at your My Zaps homepage, you'll be able to select App Connections to begin connecting your Lytho account with Zapier.
Select Add connection from the right hand side and search for "Lytho" in the search bar.

After clicking on Lytho, you will be prompted to enter your Lytho subdomain. This can be found within your Lytho URL and is unique to your organization. For example, the account URL may be https://yourcompany.us-1.lytho.com or https://yourcompany.ignite.inmotionnow.com - in both cases the subdomain would be yourcompany. Click Yes, Continue and you may be prompted to sign in to your Lytho account if you aren't already logged in.

Repeat this step for any platforms you will want to connect to and from. Now when creating Zaps with Lytho you'll be able to easily select your account information for all of your automation creations.
Begin Building a Zap in Lytho
Select your profile icon from the bottom left corner of the navigation bar in Lytho Workflow and select Personal Settings. Select Integrations from the left navigation menu and scroll down to the Zapier menu. To create a new Zap, click Create Workflow.
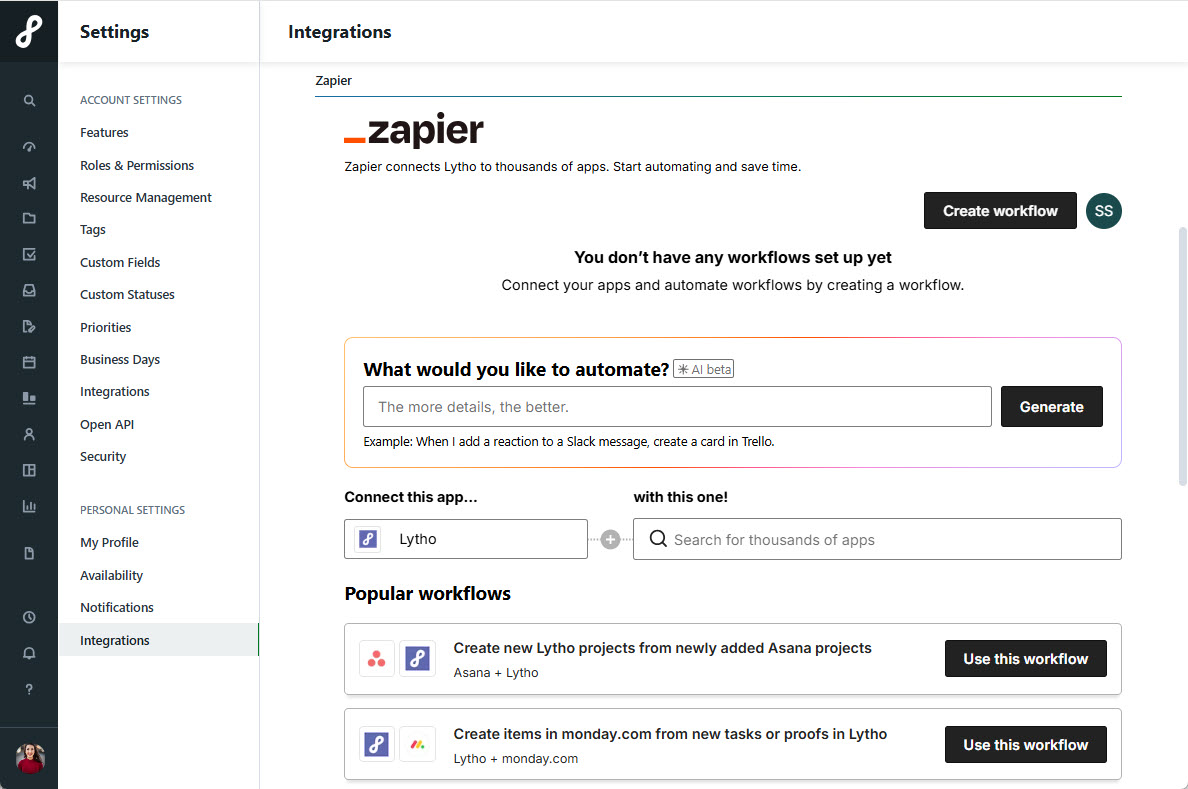
If you do not see the Zapier integration in your settings, please contact Lytho Support. Begin Building a Zap in Zapier
From the Zaps tab of the left navigation bar, begin by selecting the + Create button on the right side of the page.
Building a Zap
After selecting + Create begin by naming your Zap using the dropdown in the middle of the navigation bar.

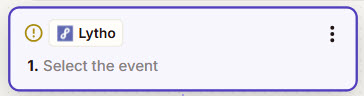
Now that you have named your Zap, continue by setting Lytho as the trigger for the action. In the Trigger search box, type in "Lytho" and select the latest available option.

You may see a yellow caution symbol appear while building out your connection. This indicates that the step has not yet fully been completed and will continue until all components of a step have been completedAfter selecting your Trigger location, you'll need to specify what in Lytho will activate the Trigger. In the Trigger event box, find the action that you would like to create an effect.
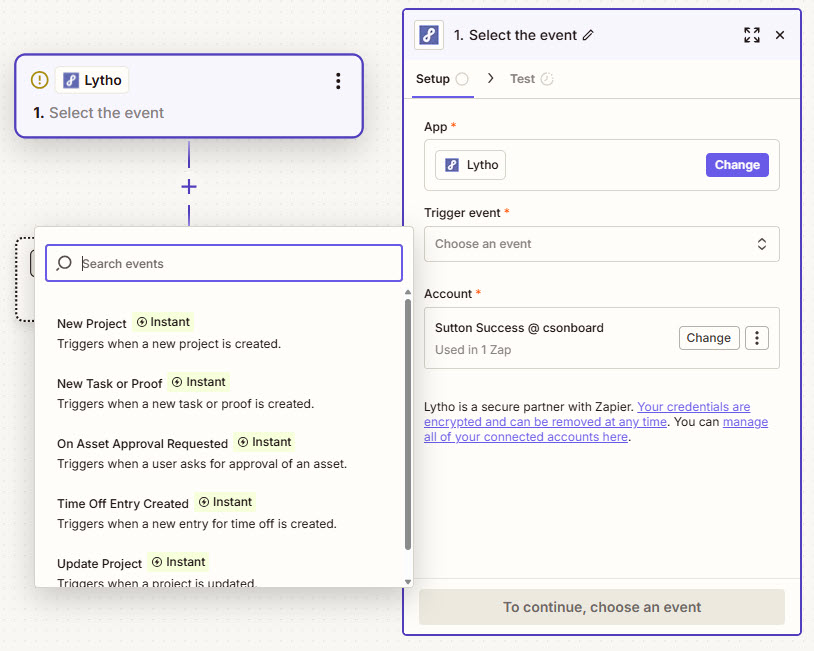
Select the account you'd like to use. If you've already configured your Lytho connection, you will see your account shown here. Otherwise, click Sign in to connect your Lytho instance with Zapier.
Once a Trigger event and Account have been assigned, select Continue.
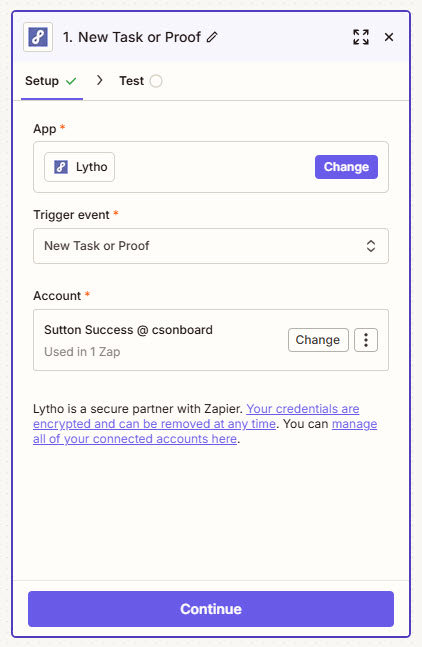
Select Test trigger button to test the connection. If successful, you should see that it pulls in examples of your trigger.

Now that we have set up what starts the Zap, we will need to specify what the Zap will do. Within the Action, select the connection and the event that you want based on the configured Trigger.

Select the Account you'd like to use. If you've already configured your connection, you will see your account shown here. Otherwise, click Sign in to connect your intended platform with Zapier.
Select Continue to establish your Action.
Depending on the platform you're connecting to, your Action configuration will differ. When you have successfully tested your Zap, select Publish.
Depending on your Zapier subscription model, your connections will be run between every minute to every 15 minutes. Free plans will trigger every 15 minutes.Additional Resources
This session provides a practical walkthrough of how to use Zapier with Lytho to connect your creative and content operations to the rest of your tech ecosystem. It covers how automations can reduce manual effort, eliminate repetitive tasks, sync information across tools, and streamline the steps that typically slow teams down. If you’re looking to improve efficiency, create smoother handoffs, or expand the impact of Lytho across your organization, this recording is a great place to start.